顯示具有 Sensors 標籤的文章。 顯示所有文章

2011年4月12日 星期二

利用LabVIEW擷取編碼器的資料(encoder)

最近剛好幫一個客戶做驗證,順便po上來跟大家分享。一般馬達通常都會有個編碼器(encoder)來量馬達的位置還有轉速(若不懂編碼器是什麼,請看這邊: 編碼器原理概論。) 要是馬達沒有編碼器的話,那我們也可以再額外加裝上去。台灣目前最常看到的兩家encoder廠商有企誠(www.honestsensor.com.tw)還有鴻璿(www.encoder.com.tw, 很好記吧),在他們網頁上會有很多各式各樣的encoder.

最近跟企誠買了一款encoder,決定用NI DAQ先給它測一下。因為NI DAQ的DIO還有counter都是5V TTL準位,所以挑選encoder的時候也記得要確認這個spec。另外也要看encoder本身需要的電源是幾伏特,這一款剛好是5V,所以可以直接拿DAQ上的5V輸出來供電給encoder。我用了一款NI USB-6212,蠻方便的。

Encoder連到DAQ示意圖:IMG_1182

接線很簡單: 紅(5V),黑(GND),綠和白為AB相位,分別接PFI0,PFI9 (這兩條是DAQ CTR0的input,我們就是要用counter來幫我們計數encoder的方波)IMG_1183

若是用LabVIEW的話,可以直接開一個現成DAQ的範例﹕Measure Angular Position.vi

IMG_1184

之後用手把encoder動一動,LabVIEW就會量到現在目前的角度啦! 

要用CompactRIO來做的話也是一樣,記得要用Digital Input或是DIO的模組(例如9411,9401),Scan Mode裡面可以直接選擇encoder輸入,把線接好相對應的接腳就可以了。

-John

2011年4月5日 星期二

Using an Bluetooth to RS-232 Converter for Robotics Use

Not much of an update this week, but we found something that can be really useful to us roboticists.  RS-232 is still a pretty standard interface among sensors for robotics.  In fact, much of the instrument drivers included in the LabVIEW Robotics Module are for RS-232 sensors (Hokuyo, Crossbow IMU, Garmin GPS etc.)  Well, what if you didn’t want to tether your sensor to your PC or CompactRIO?  Much like how you can replace ethernet with wifi, you can also replace tethered RS-232 with an off-the-shelf Bluetooth-RS232 converter.  Here’s a short video of us using this in a Hokuyo LIDAR setup.

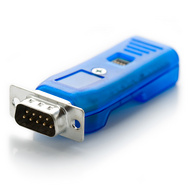
If you are in the US, you can grab one of these converters off of sparkfun.com:

Bluetooth Modem - Roving Networks RS232

Once your bluetooth-equipped PC scans and finds this device, your PC adds an additional COM port to your device manager.  Run your RS-232 programs as before, and you will now have a wireless link to your RS-232 device.

A few things to note:

1. You can manipulate the Bluetooth converter to run at your specified baud rate.  Remember, the baud rate of the sensor, the BT converter, and the BT COM port on your PC all have to be the same.  However, we did notice slower data transfer, even at the same baud rate (running a Hokuyo LIDAR at 115.2kbps.)  Just like how wifi doesn’t actually achieve transfer speeds like regular ethernet, this BT converter will have an effect on your transfer speed as well.

2. This Sparkfun unit has a RS-232 driver built in, so you don’t need to add another voltage converter for RS-232.  See this tutorial to learn why you need a driver/voltage converter.

Seattle Robotics, Project: RS-232 to TTL cable

As always, keep your feedback coming!

-John

2011年3月31日 星期四

Using LabVIEW to acquire iPhone accelerometer data

Here’s another oldie but goodie … sometime last year I wrote code to acquire iPhone accelerometer data.  It’s the same concept as using LabVIEW to acquire Wii accelerometer data, but a little simpler since all you need is to get your PC connected to your iPhone via wifi.  You also need an app such as Accel Pro or iSensor, these apps can stream and broadcast your iPhone accelermeter data through UDP protocol.  I personally recommend Accel Pro over iSensor, the newest version of iSensor (1.01) has a bug that disable the Z axis values, but hey, you can’t really expect maintenance for a free app.  Although Accel Pro is $4.99, it’s got some more functionality than iSensor such as filtering and datalogging, so it’s worth taking a look.  However, Accel Pro doesn’t include compass data like iSensor, that’s a shame.

*Caution: Some apps may claim the ability to stream UDP data, but you might have to take a look at the UDP packet protocol for the app.  Just so happens that these 2 apps have almost the same protocol, for example:

ACC: 376153408593b159a8b5f0b75b29d642694394c0,173429.723,-0.091,-0.743,-0.634

So everything before the first comma is pretty much garbage, the second number appears to be a clock or a counter of some sort, and then comes the X, Y, Z, and compass data.

Be sure to switch broadcast mode on your iPhone app from “broadcast” to “unicast”, this seems to give the best performance.  You can download the LabVIEW 2009 code from below (right click on the link, then click “save as”.)  The code is just a variation of a LabVIEW UDP shipping example.  Enjoy!

[image[17].png]

http://groups.google.com.tw/group/riobotics/web/UDP%20Receiver%20for%20iSensor%20app.vi

-John

2010年6月14日 星期一

當iPhone遇上LabVIEW,會擦出什麼樣的火花?

大家都知道,現在風靡全球的iPhone已經是無微不至,無孔不入,幾乎世界上的每個應用都有個iPhone程式,但是iPhone拿來控制機器人? 這我好像還沒聽說過。既然LabVIEW的連接能力這麼大,我們就來看看LabVIEW能不能夠跟iPhone結合在一起,我們先想辦法來讀取到iPhone的三維加速規和電子羅盤好了。

曾經我有在App Store搜尋過關鍵字LabVIEW,但是唯一的程式是個叫做VIRemote的app,那時候在NI為了做一些實驗,我們就狠心的把這個爆貴的程式買了下來(你有聽過美金19.99的app嗎? 這些人還蠻囂張的。) 雖然它功能蠻豐富,除了擷取加速規以外(沒有compass),還可以當作一個你在PC上跑的LabVIEW程式的”遙控”,就像遠端桌面那種概念一樣,在iPhone裡就會看到一個比較小但是跟PC螢幕上的front panel一樣的程式。不過它跑起來還有點麻煩,因為還要另外再下載一些專屬它的VI才能用。

http://itunes.apple.com/tw/app/viremote/id344980935?mt=8

為了幫各位節省各位荷包裡辛苦存的Coco,小弟我終於找出了一個便宜(免費)又方便的方法來擷取iPhone的加速規和電子羅盤資料。首先,先下載一個叫做iSensor的app:

http://itunes.apple.com/tw/app/isensor/id353118286?mt=8

image

它能夠透過UDP的方式直接用字串把資料透過無線網路送出來。接下來,只要你的電腦和Iphone有在同個網域,就可以接收到iPhone的字串。設定上,記得要把Network打開,Unicast或Multicast都可以用(印象中好像Unicast會比較快一點,不過要指定PC的IP。) 你可以用LabVIEW內建的UDP Receiver範例程式,或者是直接下載我修改過後的版本來用,要注意UDP port要跟app那邊設一樣就好了。

image

http://groups.google.com.tw/group/riobotics/web/UDP%20Receiver%20for%20iSensor%20app.vi

(補充: 若進到link不能下載,請按右鍵再按另存新檔)

接下來大家就可以發揮想像力,看看可以用在哪種應用。。。 這似乎比多年前LabVIEW控制Wii搖桿的程式碼還要刺激!

-John

2009年8月17日 星期一

機器人直昇機可在房子內自己找路

有趣的應用,大家可以參考參考 :-)

機器人直昇機可在房子內自己找路

2009年08月17日

正當你或許已經習慣讓無人飛機飛越自己所居住的城市這樣的想法時,他們已經開始進入到住宅裡了。

這台機器人直昇機是由一個美德合作的團隊設計出來的,最近贏得了一項競賽,這項競賽給的考題是,必須在一個模擬的核能發電廠內不借助全球衛星導航系統(GPS)的幫忙「自我導航」,然後找到核電廠內的控制面板並拍下照片。

Pelican是以由德國新興公司Ascending Technologies所設計的硬體為基礎,再搭配麻省理工學院(MIT)一個研究團隊所開發的軟體,在試了四次之後終於成功完成了它的任務,離限定時間結束只差一點點。它在國際航空機器大賽 (International Aerial Robotics Competition)裡贏得了一萬美元的獎金。

Pelican 是一台微型飛機(MAV),採用「4旋轉翼」的設計,以碳纖維骨架搭配4個螺旋槳,可透過有效範圍32碼的雷數掃描器與立體照相機將走廊與房間的分佈情形建構出來,並透過無線網路將自己進度傳輸給場外的電腦。位置與地圖的建構軟體是MIT 團隊提供的。

已經邁入第二十個年頭的IARC競賽規模雖小卻彌足珍貴,它涉及了一些目前在軍事或其他領域所無法達成的技術。微型飛機們的下一個任務(第六趟)是潛入一個模擬的有安全系統的建築物,偷出一個快閃記憶體隨身碟並用一個無用之物取代它,之後在未被察覺的情況下安全離開。

幸好目前微型飛機受到螺旋槳噪音的影響聽起來仍像是有一千隻蚊子在飛,否則所有的間諜都要因它們而失業了。


原始聯結: http://taiwan.cnet.com/crave/0,2000088746,20140224,00.htm

2009年6月8日 星期一

機器人障礙迴避 - 實作影片


不好意思,手機拍的影片很爛,我會找時間再拍個比較好的影片,不過先給大家看一下用 URG 的實作範例。現在機器人是完全自主在跑哦!

Calculating the angle of the nearest obstacle from the Hokuyo rangefinder

Now that you can obtain the range magnitude and angle arrays from the Hokuyo LabVIEW VI, here’s a little subVI to help identify where the nearest obstacle is.  Keep in mind, 0 degrees is straight ahead, positive angles are towards the left side of the sensor, and negative angles are towards the right side of the sensor.  You can add it to the Hokuyo VI like this:

image LIDAR Max and Min.vi

2009年6月2日 星期二

LabVIEW 連到 Hokuyo URG-04LX 雷射測距儀

還蠻簡單的,just follow the instructions below:

1. Download the Hokuyo URG-04LX instrument driver from ni.com/idnet (search for Hokuyo.)

http://www.ni.com/devzone/idnet/

2. Install under Program Files\National Instruments\Labview X.X\instr.lib

3. Plug in the USB port from the URG to the PC.

4. Find out which COM Port to use to communicate to the URG from Device Manager

5. Open the LabVIEW example, and select the appropriate COM Port.


如果你的URG是新的話,你可能要用他的軟體來把SCIP從1.1設成2.0. Here is the configuration tool, you can also use it to set the baud rate for the RS-232 interface (用 USB 連線的話,baud rate 的設定就無所謂了。)

URG Configuration Tool

Have fun!

-John